ミニ彩(いろ)あんどんの組み立て方 How to assemble a Mini-Uchiko-Iro-Andon
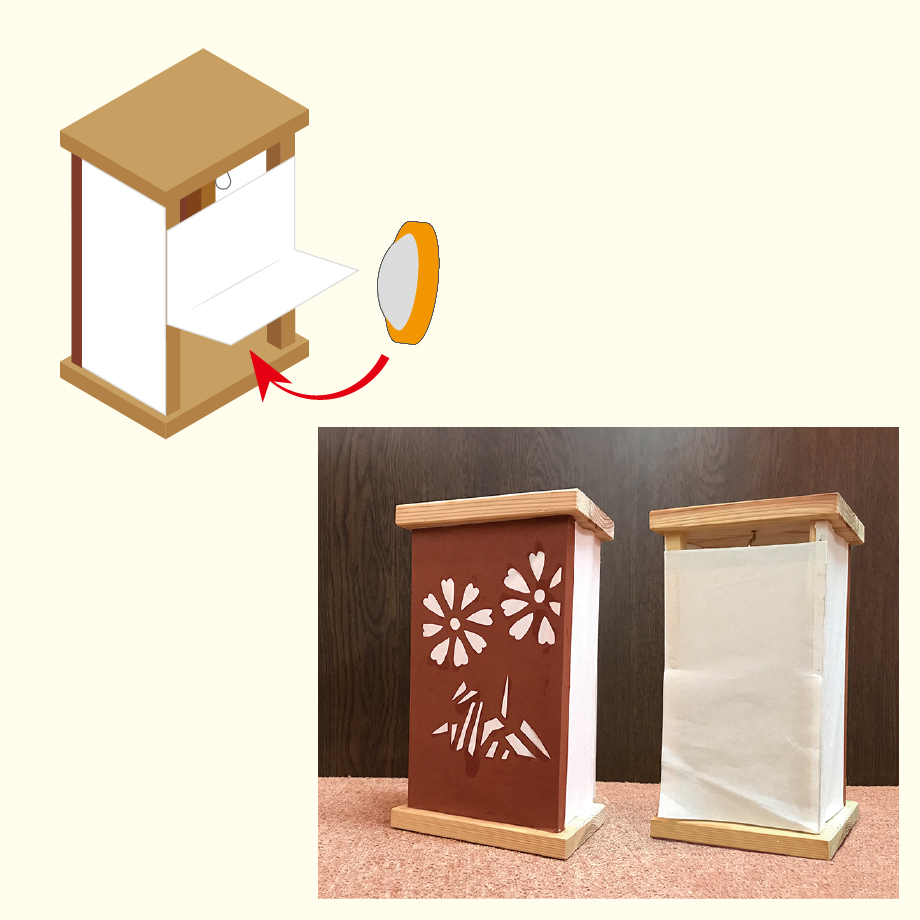
完成イメージ Expected completion

ライトに電池をセットして、裏側からあんどんの中に入れ、フックにかけてご使用ください。
Put batteries in the light.
Put the light in from the back side and hook it.
セットの内容 Contents of kit

- 白和紙(後ろ)
A Japanese paper (Back side) - 白和紙(横) × 2
Two Japanese papers (Left and right side) - 柿渋切り絵和紙
A Cut picture made with Persimmon stain dyed Japanese paper - ライト(付属の電池をセットします)
A light (Batteries included) - 柱 × 4
4 columns - 下板
A bottom plate - 上板とフック
An upper plate and a hook
組み立て方 how to assemble
上板にフックをとりつける Attach the hook to the upper plate.

上板にはフックをつける位置にあらかじめ穴が開けてあります。
フックの先が内側を向くように取り付けてください。
The upper plate has a hole for attaching a hook.
Attach the hook so that the tip of the hook faces inward.
板と柱を接着する Bond the plates and columns.

上板と下板の四角い穴にボンドを少量入れます。
穴に柱を差し込み、しっかり押さえます。
Put a small amount of bond in the square hole in the plates.
Then insert the columns into the holes and press firmly.
ゆがみがないか、確かめながら押さえます。
Check while pressing so as not to distort.
柱にのりづけ位置をマークする Mark the bonding positions to the back columns.


白和紙(後ろ)を柱の下端に合わせます。
柱の、和紙上端と交わるところに鉛筆などで印をつけます。鉛筆の代わりに先の尖ったもので印をつけると、跡が目立たず仕上がりがきれいです。
Put the Japanese paper (Back side) on the bottom plate. Draw lines on the columns along the top edge of the paper with a pencil. You can use a stylus or the like so that the marks are not too noticeable.
和紙を一旦外し、先ほどつけた印から10cm程度下に印をつけます。
Once, remove the paper from the pillar. Mark about 10 cm below the mark you made earlier.
柱に白和紙(後ろ)を接着する Bond the Japanese paper (Back side) to the columns.

手順3でつけた印と印の間に木工用ボンドを塗り、和紙を貼り付けます。
Bond the paper between the marks made in step 3.
柱に白和紙(横)を接着する Bond the Japanese papers (Left and right side) to the columns.

柱の側面の上から下までボンドを塗り、白和紙(横)を貼ります。反対側も同様に貼ります。
Bond the Japanese papers (Left and right side) to the columns. From top to bottom.
和紙がはみ出る時は、はさみなどでカットします。
If the paper is too wide, cut excess with scissors
柱に柿渋切り絵和紙を接着する(完成) Bond the cut picture to the colums.

柿渋切り絵和紙を柱に当て(まだ接着しません)、側面に1.5cm程度折り畳みます。はさみなどで折り畳み部分の長さを調整します。
Put the cut picture on the front. Do not bond now. Fold it 1.5 cm to the both sides. Cut excess.
切り絵の折り畳んだ部分の裏にボンドを塗って接着します。
Bond to the back of the folded part.
